Making a Scripted TikTok Video on your Mac
YouTube - Watch this post's supporting video.
Producing and editing videos on your phone can be pretty awkward. Especially if you want to plan what you want to say in any detail.
CueCam Presenter is a Mac app that works with your iPhone and iPad to script and record videos.
You can record in TikTok’s vertical format, using your iPhone as your camera and teleprompter.
You can use a green screen, share websites, add titles and graphics, all in one recorded take.
Here’s how to get started.
Set up CueCam Presenter
Download and install CueCam Presenter from this website.
Install Shoot Pro Webcam on your iPhone from the App Store.

Set CueCam’s output to Vertical via the Output menu.
Run Shoot and select it as your main camera in the Live Camera window.

Adjust the framing, exposure as needed using the toolbar controls.
Turn on “Program Feed” so you can see what is being recorded on your iPhone screen.

Set up your microphone. Check if it’s in sync using the Delay Calculator.
Start writing
Create a new document in CueCam. This is a video script that controls your teleprompter and brings in any other content you want to share.
Think of it as a sequence of cue cards with notes that you can read without breaking eye contact with the camera.
For best results, your cards should be short enough that your eyes don’t move too much as you read them. You can use a pinch gesture on your iPhone to change the size of the teleprompter text depending on how close your are to your iPhone and how much text you want to see on each card.
The only keyboard shortcut you need is Cmd+Enter. This will add a new, blank card below the current card.
If you want to do your initial planning outside CueCam, I recommend Apple Notes. This makes it easy to switch between your phone and Mac, and you can paste in any graphics you want to use.
Copy-paste your Notes document to turn it into a CueCam script, images included.
Story tips
If you already know what you want to talk about, you should be off to a great start. If not, here are some concepts I’ve found useful in storytelling.

Dan Harmon’s Story Circle is a way to think about story at the scale of a tv episode or a single scene. You start out in a status quo, something causes a change, you adapt, struggle, overcome the challenges before returning home, but changed.
You might be tempted to think of yourself as the hero of any story you tell, but if you’re making content to help other people then THEY are the hero, with you as their GUIDE.
A shorter way to think about this is in terms of two components: 1. Aspiration and 2. Struggle. Your hero wants something, and the story is how they overcame adversity to get it. This is easy to apply to any video. “Do you want to do X? It’s hard because Y but you can solve it by doing Z”.
Recording a video
Select your first card and click the Record button in the toolbar to start a recording.

CueCam will enter Presentation Mode, and you will see the text of your first card on your iPhone screen.
Use the right arrow key or click anywhere to step through your script.
When you’re finished, hit Stop in the toolbar. A button will appear to “Show File” and you can play back the recording.
CueCam has an “editless video production” philosophy, with the idea that it’s easier to record another take of your video than to edit a video together from multiple takes and doing a lot of post-production.
We do our production in-camera and set up any content to share in advance.
Adding content
You can illustrate your videos by sharing content. The most common ways to do this in a TikTok video would be a) sharing an image, b) sharing a website or c) sharing a video.

Previewing content
CueCam’s preview is not particularly useful when working in vertical mode. The picture-in-picture preview is wrong and the video cropping preview is awkward. This will improve in time, but for now you should check what it will look like by going into presentation mode.
Sharing an image
CueCam cards can show images in two different ways. You can build up a “slide” with text and images in sequence or you can share an image full screen, with you appearing picture-in-picture.
To create a slide, drag an image into the text part of your card.
To share an image full-screen, drag it into the main window with your card selected.
You can crop a full screen image by pinching on your trackpad or using your mouse wheel.
If you want to pan around an image, you can duplicate a card and a smooth transition will take place when you present each card in sequence.
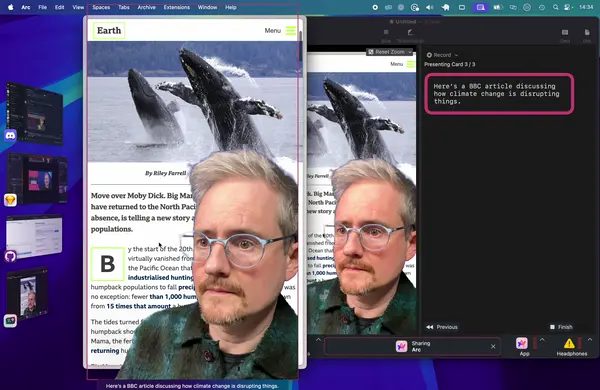
Sharing a website
Click Add Card in the toolbar and select “Share Website”. Or to add a website to an existing card, us the Screen button in the toolbar and click “Share Website”.
Paste the url you want to show into the pop-up box.

This will do two things. 1) it will share your screen, isolated to your default web browser and 2) it will load the website you want to share.
This feature works particularly well in the Arc browser as it will make sure you don’t spawn a lot of browser tabs when switching websites. This browser is a bit neater-looking in general so is recommended for showing in videos over other browsers.
Use the trackpad to crop in on the area of your browser you want to show.
Sharing a video
You can share a video in one of two ways. 1) Use the website sharing feature to share a YouTube or TikTok video or 2) drag a video into a card in CueCam and share it directly.
Follow the website sharing instructions to share a YouTube video. When you present, the audio will be included. You can see quickly if the video is coming in too loud and adjust in your browser or in the audio control that appears in CueCam’s bottom bar.

To share a video directly, select a card and drag it in. This is usually a better way to work as it avoids any ads or branding added by video platforms. If you want to download a video for use in CueCam, Downie works well. Or you can go to Pexels to get free footage. You can crop in using the trackpad and loop using the pop-up menu or sidebar.

Rinse and repeat
Now you have everything you need to record videos on your Mac. You know how to set up your iPhone as a teleprompter, write a script and add images, videos and websites.
Post production
I recommend doing a bit of post production inside the TikTok app itself, where it’s easy to generate and edit captions and choose from a wide variety of title styles.
It’s also a convenient place to stitch together takes if you didn’t manage to get everything in one.
If you do end up recording a video in pieces, you can use the “Mark Good” feature in CueCam to make it easy to find the best takes later.
If you want to edit in Final Cut Pro or Resolve, you might want separate video tracks. You can tell CueCam to record different tracks using the Record button’s menu.