Help & Support
How-To Guides
Find out how to do specific things in CueCam.
Tutorials

Advice For Makers
Coaching
Course Creation
Faith / Worship

Friends & Family
Live Streaming
Meetings
Studying
Teaching
New tutorials added regularly. Join the newsletter for updates.
Installation & Set-Up

How to download and install CueCam Presenter Simple
-
Download the app (you do not need to sign in)
-
Open the DMG file
-
Drag CueCam Presenter into Applications
-
Launch CueCam by navigating to your Applications folder, via LaunchPad or use Spotlight.
-
You should see a message saying that Apple checked it for malicious software and none was detected. Click “Open” to continue.
-
You will now see a checklist of set-up steps


- Click “Install” next to “Install Camera Extension”
- Note the instructions before using the button “Click here first”
- Click “Open System Settings”


- Back in CueCam, now you can press “Install” next to “Install Virtual Mic”


When you log back into your Mac, CueCam Presenter is ready to use!
How to use CueCam with Zoom Simple
Using CueCam as your Mic and Camera
In your call, use the small arrow buttons next to Audio and Video.

Select CueCam Audio as your microphone.

Select CueCam as your camera.

Turn on Original Sound for Musicians
Your audience won’t be able to hear audio from videos and screen shares via CueCam unless you turn on “Original Sound for Musicians”.
Enable this by going to Zoom’s Settings window.

Ensure this is enabled for any meeting in which you are using CueCam.

Take over a call with your CueCam presentation
-
Reveal CueCam’s “Program Window”
-
Share this window in Zoom


This will have the added benefit of making text sharper, although your camera video frame rate unless you check “Optimise for video clip”
If you are already using CueCam as your microphone, leave “Share sound” unchecked.
How to use CueCam with Google Meet Simple
Select CueCam as your camera inside Google Meet.

If you plan to share videos or screen shares with audio, use CueCam’s Audio (Virtual) input.

Drawing using Video Pencil on your iPad
Launch Video Pencil on your iPad to draw directly on your camera. This will come through to Google Meet.
Note that the preview will be mirrored, but your audience will see the right thing.

Sharing your screen
Instead of using Google Meet’s screen sharing feature, share your screen using CueCam.

This will allow you to see what you’re sharing on the iPad screen while you draw on it.

How to use Video Pencil with CueCam Presenter Simple
CueCam Presenter is the best way to use Video Pencil with your Mac.
In order to draw on your webcam, you need a virtual camera where you can share and draw
What about Video Pencil Camera? Video Pencil Camera (VPC) is an older way to connect your iPad, fully replaced by CueCam Presenter since 2024. CueCam does everything that VPC did, but better.
- Launch CueCam Presenter on your Mac
- Launch Video Pencil on your iPad
You should now video from CueCam’s on your iPad and see your drawings on your Mac.
Troubleshooting
- Make sure both your Mac and iPad are on the same Wi-Fi network or connected via USB

How to sign in to CueCam Presenter Simple
When do you need to sign in?
You can use most of CueCam’s features without signing in at all.
Sign in is required only when
- You want to upgrade your plan
- Access discounts if you already paid for Shoot, Video Pencil or Beat Sheet
- You want to access your paid plan
- Use AI features
- Access CueCam Cloud (coming soon)
You don’t need to sign in to:
- Use the live camera
- Connect to Shoot and Video Pencil
- Create scripts
How to sign in
- Click “Sign In”. This will launch your default web browser
- Sign in to the website using your Apple ID
- If your browser requests permission to open CueCam, press “Allow”
Troubleshooting
If you use Safari, keep an eye out for blocked popups.

If you see this icon, click it and then allow CueCam to launch.
How to draw on Ecamm Live with Video Pencil Advanced
The simplest way to use Video Pencil in Ecamm Live is by using CueCam’s virtual camera. This way, all compositing will be done by CueCam and you can simply select it as a source in Ecamm.
However, you may have require more complex scenes than CueCam can create (e.g. multiple cameras, side-by-side layouts or using Interview Mode), in which case you’ll need to send Ecamm’s output to CueCam and use the Video Pencil transparent layer provided by CueCam.
This will allow you to see your Ecamm scene on your iPad and draw accurately with Video Pencil. You can just leave CueCam running in the background for the iPad connection alone.
IMPORTANT: You do not need NDI! CueCam creates an optimised connection between your Mac and iPad automatically.
Enable Virtual Cam feature in Ecamm Live’s Output menu.

Open CueCam’s Dashboard via the Live Camera, status bar menu (your Mac’s top right system menu) or via the Dashboard sidebar in a document.
Select Ecamm Live Virtual Cam as your camera in CueCam.

Enable CueCam’s Syphon output in CueCam Presenter → Settings
Add a layer in Ecamm with the source “Video Pencil via CueCam”.

Make sure this layer fills the canvas (using the trackpad or mouse wheel is easiest) and lock it!

At time of writing (CueCan 2.0.4, build 94), you may need to keep CueCam’s Live Camera window open for this to work. In future versions this won’t be necessary.
How to draw in OBS using Video Pencil Advanced
To draw on your camera or sources shared via CueCam
- Launch CueCam
- Launch Video Pencil on your iPad
- Add “CueCam” as a Video Capture Device in OBS
Now you will see your camera, with any drawings, inside OBS.
To draw on sources shared from OBS
Start OBS Virtual Camera

In CueCam, go to Live Video and select OBS Virtual Camera as your main camera.

Enable CueCam’s Syphon output in CueCam Presenter → Settings
Add a new “Syphon Client” layer called “Video Pencil”.

Select “Video Pencil via CueCam” as the source and check “Allow Transparency”.

Make sure this layer lines up perfectly at a 16:9 aspect ratio and you’re all set.

IMPORTANT: You do not need NDI!
How to use Shoot Pro Webcam with CueCam Presenter Simple
All Shoot Pro Webcam features are unlocked if you have an active CueCam subscription.
Use your iPhone or iPad as your main camera
Launch Shoot on your iOS device.
Your device appears in CueCam’s toolbar.

Select Shoot as your camera in CueCam.

Your main camera is now Shoot on your iPhone.
Use your iPhone or iPad as a second camera
Launch Shoot on your iOS device.
Your device appears in CueCam’s toolbar.
Use the Share Bar to select your Shoot device.

To trigger this from a card, use the Camera button in the toolbar and select Shoot.

Your main camera will appear as picture-in-picture by default. Click the camera button to toggle picture-in-picture.

Shoot’s interface on the iPhone

When you use Shoot with CueCam Presenter, its user interface changes accordingly.
In the above diagram we can see some extra features.
- Program Feed toggle button - when CueCam is sending a program feed or video call window (more about this below) you can toggle the feed from your Mac using this button.
- When running a presentation, your teleprompter text appears next to the device’s camera. This allows you to read your notes while maintaining decent eye contact with your audience.
- Here you can see how CueCam’s virtual camera is visible on the iPhone, with the card’s title visible.
Steps to ensure smooth operation
- Enable Do Not Disturb mode on the device running Shoot. This is to stop calls, notifications or other interruptions from putting the app in the background.
- Do not activate Continuity Camera as you will have to physically unlock your phone again to relaunch Shoot. Continuity Camera is not visible in CueCam as a source by default to help reduce the risk of this happening.
- Power the device running Shoot. You don’t want the battery running out and when you’re using CueCam’s two-way video connection it can increase the load on your device.
Controlling your camera settings
Lots of remote control and camera settings are available from within CueCam on your Mac.
- Program Feed - you can toggle the program feed from your Mac. Here you can see that CueCam’s virtual camera is being sent the iPhone. Using this select box you can select a different window on your Mac, for example your current Zoom call.
- Select which of your device’s cameras you want to use by clicking one of these panels
- The panel will expand to show settings for the selected camera. Some cameras will have more features than others (e.g. focus is not available on the front-facing camera).
- If you have saved camera presets in Shoot, they will appear here and can be selected with a click.
- You can tweak your iPhone’s Zoom, exposure and white balance settings here. Click the reset button next to a slider to go back to automatic settings. Note that ‘EV’ only applies when you have long-pressed on your iPhone screen to lock focus and exposure. Conversely, ISO and SHUTTER only apply when you have NOT locked focus and exposure. The front-facing camera doesn’t have a FOCUS control, but the back cameras usually do.
- Face Follow Enable this setting to have Shoot keep your face in the centre of the shot. This is particularly useful when using picture-in-picture as it will keep your face in the middle of the circle. When presenting slides with Face Follow active, if you use a left-hand-side or right-hand-side layout, Shoot will centre your face on the other side of the frame so you don’t have to worry about moving out of the way of your titles.
For more settings, including Green Screen, Grid and LUT, select the device as your main camera and select Settings for ![Your device name].
Understanding Face Follow
Face Follow keeps your face in the centre of the frame.
You can adjust the rate (a higher number means it will track more quickly) and scale (a higher scale will make your face bigger in the frame by cropping more of the edges.
When running CueCam presentations, Face Follow is aware of the currently-presented slide layout and will move you out of the way of and left or right side content automatically, returning you to the centre of the frame (or picture-in-picture circle) in other cases. This is useful when using the “Expert” slide mode, but not important for “Clean”.
Using Shoot as a teleprompter
When you run a presentation, teleprompter notes are automatically displayed in Shoot.
If the teleprompter isn’t quite aligned with your device’s camera you can drag up and down on the phone screen to move it.
If the text is too small, you can pinch to change its size.
There is a teleprompter toggle inside Shoot if you really don’t want this. Scroll the left-hand-side menu until you see a T in a box.
Viewing your Mac’s Zoom / Teams / Meet window on your iPhone or iPad
Click the device running Shoot’s icon in the toolbar.
Ensure “Send program feed to Shoot” is checked.
Select the window of your meeting in the dropdown.

Now your device’s screen will display your meeting window.

Drawing directly on your camera in Shoot
Shoot has a built-in telestrator. Access this feature by scrolling down the left-hand bar and looking for the telestrator icon (below the “5” in the image below).

You can pick different colours, dim the background, undo and change the Live Titles language using the toolbar at the bottom-right.
Clear your drawing with a double-tap.
Pausing the image from Shoot
Tap with two fingers on the device running Shoot to pause the video.
This lets you draw using Shoot or via Video Pencil on a separate iPad, without having to keep the device or action steady.
A second two-finger tap resumes the camera feed.
You can also use the “pause” button in the left toolbar of Shoot.
Get your camera level
Turn on Shoot’s grid (this won’t come through to CueCam) to activate the “Level” feature.

How to uninstall CueCam, its camera extension and virtual mic Simple
Virtual Mic (CueCam Audio)
Before deleting CueCam, remove the Virtual Mic via the Output Menu.

Alternatively, this can be removed by deleting the file at:
/Library/Audio/Plug-Ins/HAL/CueCam Audio.driver
Camera Extension (CueCam)
Deleting CueCam Presenter from your Mac (via Finder) should result in a system prompt to confirm that the camera extension will be removed in the process.
However this macOS feature does not work 100% reliably.
If the camera extension is still present after deleting CueCam
Reinstall CueCam and uninstall the camera extension through Output menu.

Then you can delete CueCam again.
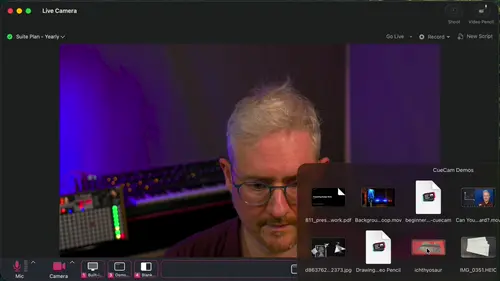
Live Camera

How to use the Live Camera Simple
Access the Live Camera window by using File Menu → “Show Live Camera”, the Window menu → “Live Camera”, or by double-clicking CueCam’s dock icon.

- Plan Information - If you have a paid plan, you can book a support call directly with the developer.
- Shoot and Video Pencil connection status - these icons show the status of apps running on your iPhone or iPad.
- Program Window Launcher - click this to reveal a window showing CueCam’s output and nothing else, allowing you to use CueCam with an external screen or sharing this window via your meeting software.
- Record Button - start and manage recordings
- Connected Apps indicator - shows which apps are using CueCam’s virtual camera
- Mic Selector - select and configure your main microphone
- Camera Selector - select and configure your main camera
- Share Bar - select a source to share, e.g. a screen, app, window, picture, video or blank board for drawing
- Headphones Selector - Select and configure your headphone output


How to use your iPhone or iPad as your main camera with Shoot Simple
- Install and launch Shoot on your iPhone or iPad. Get Shoot.
- Click the triangle on Camera button and select your Shoot camera

Select your device’s the Front Camera if you want to be able to use Shoot’s built-in teleprompter and program preview.
Troubleshooting
If you don’t see Shoot, please check the following:
- Are your devices on the same network?
Make sure all devices are on the same WiFi network, or plug them into your Mac with a USB cable - Do you have restrictive Firewall settings enabled?
If you change your Firewall settings on your Mac, you should restart your computer before trying Shoot + CueCam again.
Workaround Sometimes force-quitting Shoot on your device or restarting CueCam will resolve connection problems. (But please tell Michael if you have persistent problems!)
Framing yourself nicely Simple
When you’re on a call, it’s usually best to frame yourself like this:

If you are using a lot of slides, it’s worth being off to the side a bit, like a newsreader.

Lining yourself up inside CueCam
You can access these layouts and more inside yout camera settings or by using the secondary-click menu.

Face Follow via Shoot
If you are using Shoot as your webcam you can turn on “Face Follow” to keep your face centered.
Access Shoot from the menu and check “Face Follow”

This is great if you’re presenting slides, because Face Follow adapts to your current slide layout. Here is a card with a title in the middle. Face Follow keeps you centered.

Face Follow on Shoot automatically moves you to the side so that you don’t block your left-aligned content area!

How to quickly share your desktop Simple
The Share Bar at the bottom of the Live Camera window makes it easy to share your desktop instantly.
If you haven’t shared anything before, click the Share Button and select “Pick Screen...”
Alternatively, secondary-click anywhere to see the sharing menu.
You will be prompted by the system to select a screen.

When you are sharing your screen you will appear picture-in-picture.

Click the Share Bar again places you in “Aside 3D” mode.

Use the “X” to stop sharing completely.
CueCam Presenter always remembers the last thing you shared from the Share Bar.
You can share the same screen again with one click.
How to quickly share a picture from your computer Simple
Open the sharing menu from the share bar or with a secondary click in the live camera.
Choose “Share Image...”

The window changes to show you your options.

Click “Open Image...” to choose a file from your computer.
If you have copied an image to the clipboard, press Paste Image.
Or just drag an image into the window and it will be shared instantly.
You do not need to select “Share Image...” to share an image, just drag and drop!
Zooming in
You can zoom in on images using a trackpad pinch gesture or your mouse’s scroll wheel.
Annotating images
Use Video Pencil on your iPad to draw and annotate the shared image.
How to quickly share a second camera Simple
If you have a camera plugged into your computer you can share it as a second camera, with your main camera appearing picture-in-picture.
If you have an iPhone, you can launch Shoot and select this as a second camera in the same way.
Open the sharing menu by clicking the Share Bar or right-clicking anywhere in CueCam’s main window.
Then select the camera you want to share.

You will appear picture-in-picture on the bottom right. Click the camera icon to toggle.

Overhead camera tip
Turn on Shoot’s grid to get your phone perfectly level!
How to quickly share a video from your computer Simple
Drag and drop
Drag and drop any video on your computer into CueCam’s Live Camera window.
Now use the play button to start playback. You can change the volume, playback rate and more.
If the video is in Photos, drag it to your Desktop first, then drag it into CueCam.
You can also drag it directly onto CueCam’s application icon.
Sharing the video’s sound
To share the video’s sound, you need to use CueCam Audio as the microphone input for your video call.

This allows CueCam to mix your microphone with other audio sources like videos.
Changing the volume
When a video is playing, you’ll see an audio source in the bottom bar.
Click on the button to mute and unmute the video.
Click the up arrow next to the icon for more settings:

You can turn headphone monitoring on and off for this video.
The change the volume, use the fader on the left.
Try to keep the volume in the green!
How to share a YouTube video on your webcam Intermediate
- Open your YouTube video in a web browser
- Open the Dashboard from the status menu or by showing the Camera
- Click the triangle on the “Share” → “Windows” → select the name of the browser window containing the YouTube video

Your YouTube video will now be presented on your webcam, and your face will appear in the corner in picture-in-picture mode.
Sharing the video’s sound
To share the video’s sound, you need to use CueCam Audio as the microphone input for your video call.
This allows CueCam to mix your microphone with other audio sources like videos.
Changing the volume
When sharing your browser, you’ll see an audio source in CueCam with the tab’s title.

Tap the main part of the button to mute and unmute the audio.
Click the pink bar at the top of the button to see more controls.
Use the pink slider control to change the volume. Try to keep it in the green.
Change picture-in-picture
If you don’t want your face in a circle, just click the Main Camera button to hide this. Another click brings it back.
Alternatively, you could download the video from YouTube with an app like Downie, and then share from your computer. This is probably a better experience for your viewers as you can avoid showing them ads. How to quickly share a video from your computer
How to quickly add text to your webcam Simple
Option 1 - Dashboard on your Mac
- Open the Dashboard from the status menu or by showing the Camera
- Click “Text...” and start typing


The text will appear along the bottom of your webcam feed.

Change the size or font
Fonts are managed per-document in CueCam, so changing the font size will change it for all shared text, including bullet points and titles.
Go to the Slides menu.
Here, you can change the font size, or select a different font from the Font menu.
Option 2 - Live Titles on your iPad
If you have an iPad, you can use Video Pencil‘s Live Titles feature to add text to your stream.

You will see CueCam’s virtual camera on your iPad screen to see exactly where you’re adding the text.
The size of the text is set by the length of the line you draw.
Change the font with the T icon in the Video Pencil toolbar.

Here you can add fonts and languages for quick selection.
How to temporarily set aside your desktop or shared video with Aside 3D Simple
Aside 3D allows you to temporarily move whatever you’re sharing to the side.

How to quickly share your desktop
How to quickly share a video from your computer
-
Share your desktop or a video.
-
Open the Dashboard from the status menu or by showing the Camera
-
Click the “Aside 3D” button

Your shared desktop or video will move to the bottom corner to let you speak to the camera.

Press the Aside 3D button again to bring it back up.
Using the keyboard
You can press the “A” key to toggle Aside 3D, as long as you are not currently editing a card’s text.
You can also toggle Aside 3D from your Stream Deck: How to toggle Aside 3D from your Stream Deck
How to appear picture-in-picture on your Live Video Simple
When you share full screen content in CueCam, your main camera will be shown as picture-in-picture in the corner.
This can appear one of two ways:

You can be in a circle in the corner.

Or if you have a green screen, you can appear overlaid directly on the background, a bit bigger!
Toggling picture-in-picture
When you’re sharing something full screen, the main camera icon in your Dashboard (accessible via the Live Camera, Mac Status Menu or Dashboard sidebar) shows a person in a circle.
Cilck this button to toggle picture-in-picture.

To enable green screen picture-in-picture mode
Access your camera settings at the bottom of the Dashboard. You will see the name of your main camera.

This reveals the Green Screen toggle.

Turn it on to access the settings and you’ll see your picture-in-picture mode change to match.

More more info about green screen settings, see How to use a green screen .
How to zoom in on your desktop Simple
If you are sharing your desktop or an app (not a single window) you can zoom in using any preview window or using Video Pencil running on your iPad.
In a preview window
You can use the Live Camera, Teleprompter Window or any document where the camera preview is active.
Zoom in by pinching on your trackpad or the scroll wheel or gesture on your mouse.
To pan, click and drag with the left mouse button.
Use the Reset Zoom button to go back to full size.

Via iPad
Video Pencil displays your camera preview directly on your iPad so you can see where you’re drawing.
If you’re sharing your desktop, it allows you to use a pinch gesture to zoom in.
You can also drag with two fingers to pan around the zoomed desktop.
Use the Reset Zoom to go back to full size.
See How to use Video Pencil with CueCam Presenter

Customise the “Reset Zoom” position
When sharing your desktop, you can “Save Zoom for Share” to customise the Reset Zoom button to revert to your preferred size.

Document preview
If you are using picture-in-picture and/or Video Pencil, you will see this in-context on your desktop as you zoom and pan around using your Mac or iPad.

How to record vertical and square videos in CueCam Presenter Simple
You can change the video format via the Output menu option "Output Shape".
CueCam supports multiple output shapes:
- 16:9 (Widescreen) - Standard landscape format
- 9:16 (Vertical) - Perfect for TikTok, Instagram Stories, YouTube Shorts
- 1:1 (Square) - Ideal for Instagram posts
You can record directly in CueCam with your chosen output shape, or use CueCam's virtual camera output in apps like QuickTime Player.
Aside and screen sharing behavior in vertical mode
When using vertical (9:16) format, Aside 3D adapts its layout to suit the vertical orientation. Instead of appearing in a bottom corner, content repositions to work better in the vertical space.
Slide content will always fill the screen, with different layering depending on your green screen settings.
Note: This feature requires an active subscription.
Use your iPhone as a virtual green screen camera with Shoot Intermediate
- Get Shoot on your iPhone or iPad
- Go into Settings, scroll down and under “Experimental” turn on Virtual Green Screen
- Select your last numbered camera and Shoot will use your depth camera to create a virtual green screen
- You can adjust the green screen settings via CueCam’s sidebar
How to add a LUT to your main camera Advanced
If your camera is set to a logarithmic colour profile, you can add a LUT.
Access your camera settings at the bottom of your Dashboard (found in the Live Camera, Mac Status Menu or Dashboard document sidebar).
There is an area marked “Drag LUT here”.

Grab your LUT in .cube format and drag it in.

Looking good!

How to use a green screen Advanced
CueCam Presenter has an chroma key feature with advanced controls.
You can access these settings via your Dashboard in the Live Camera window, the document side bar or the status menu. Green screen configuration is applied and saved with each camera source.
Click to expand the camera settings.

Use the Green Screen toggle to activate the effect. You can adjust the similarity, smoothness etc... to fine-tune the setting.

To pick your background colour, use the Key swatch.

Changing your background
You can add a background image behind your chroma key by dropping an image into the Background Image slot.

This will be used to fill out your frame.

When you share content your picture-in-picture effect is no longer presented in a circle, but neatly overlaid over whatever you’re sharing.

Video Pencil
![]()
How to use Video Pencil’s Magic Wand tool (with sound) Simple
Video Pencil lets you brighten up any video call or live stream with the Sparkle Wand tool.

This want is available in Video Pencil on your iPad.
You can test it by tapping the dotted circle in Video Pencil.

How to make sure your audience hears your sparkles
The sound is automatically brought in when you use CueCam with Video Pencil.
To ensure your viewers can hear it in Zoom, make sure you have “Original Sound for Musicians” turned on (otherwise it will get removed by voice isolation / noise reduction features).
How to highlight content with Video Pencil’s spotlight feature Simple
You’ll need an iPad running Video Pencil. How to use Video Pencil with CueCam Presenter
The spotlight tool appears at the bottom.

Share something you want to highlight.

Now tap the spotlight tool and draw a rectangle around the area you want to focus on. You can then draw immediately.

Long-press for more options
You can press and hold for more options.

- Darken or lighten the mask
- Change behaviour:
- Don’t Clear - adds a spotlight leaving the current drawing intact, and does not clear any existing spotlight first
- Clear Spotlight - clears the current spotlight
- Clear Drawing & Spotlight (recommended) - clears the current drawing and spotlight so you can show a detail in one go without having to manually clear / reset etc...
- Darken All - darkens the entire background ready for drawing
Video playback control with Video Pencil Simple
You can play back videos in CueCam on your Mac or from your iPad using Video Pencil.
Loading a video directly inside CueCam
There are many ways to load a video in CueCam on your Mac.
- Drag a file in to the Live Camera preview
- Right-click the Live Camera preview and select “Share Video...”
- Click the arrow on the Dashboard’s “Share” button and select “Share Video...”
- Drag a video onto a card in your script and present that card
If you load a video from a card it will play automatically.
If you select a video live then it will be paused to give you a chance to unmute and adjust the volume before playing.
You’ll then need to press the play button, visible in any of CueCam’s windows and in the Dashboard system menu.

Loading a video on your iPad
You can load a video into Video Pencil directly on your iPad using the Media button and tapping either “Pick from Photos...” or “Pick from Files...”.
When you select a video on your iPad, playback will begin automatically.
Any videos you have recently loaded can be accessed directly from the same menu.
Note that any video playing from Video Pencil will appear on top of anything being presented by CueCam Presenter (as it uses the drawing layer which covers everything).
Scrubbing through videos
There are two ways to scrub through a video.
The fast (but less accurate for longer videos) way is to use the timeline slider next to the play button.
If you need fine control (e.g. when telestrating a sports play) you can use Video Pencil’s Shuttle Wheel.

Using the Shuttle Wheel
Place your finger on any part of the wheel and rotate clockwise or counter-clockwise to scrub through the currently playing video.
The faster you rotate your finger, the faster the video will go, or you can slow right down to find the exact frame you’re looking for.
The Shuttle Wheel works whether the video is playing inside Video Pencil or from CueCam on your Mac! (BETA Version)
There are three buttons to the left of the wheel: the “Auto Clear” toggle and undo/redo buttons.
Auto Clear
If Auto Clear is enabled, whenever you scrub the video your drawing will be cleared.
This makes it very easy to telestrate on dynamic action.
If you press Undo after your drawing was auto-cleared, your latest drawing will be restored.
You can tap the button to switch this feature off and on.
How to record Video Pencil’s output using your Mac Simple
First, install CueCam Presenter on your Mac.
Run Video Pencil on an iPad connected to the same WiFi or via USB.
CueCam automatically finds the iPad and anything you draw or share on the iPad will appear in CueCam.
Recording with CueCam
CueCam’s Live Camera window has a Record button.
Click this button to start recording.
This feature requires a paid plan.
Recording with QuickTime Player
If you don’t have a paid plan, you can record for free using QuickTime Player.
In QuickTime, use the File Menu to select “New Movie Recording”.
Select CueCam as the Camera and Microphone inputs and press the Record button.

Recording Multiple Layers
CueCam’s Suite Plan lets you record your camera, shared content, presented slides and Video Pencil drawings (with a transparent background), to separate files for later editing. You’ll still get the master recording, with these additional recordings placed in their own folder.

Building Presentations

What is a CueCam presentation? Simple
A CueCam presentation is a sequence of “smart cue cards”.
Anatomy of a Smart Cue Card

- The play button immediately moves this card to your teleprompter and its content to your virtual camera.
- The text area contains a combination of teleprompter text and an slide content (highlighted in pink)
- Here we see a slide image called DNA.jpg - this will show up on your virtual camera
- A slide title is denoted with a leading
#character and will show up on your virtual camera. - Attachments (like a video, screen share or second camera) and triggers (like opening a link or starting a recording) appear on the top right.
- The “Add Content” button lets you browse all the possible available types of attachments and triggers.
You can scroll through the content menu to see what’s available.

You can drag cards, just make sure you’re not over the text area - your mouse cursor should be an arrow.
Cards also have a context menu if you right click.
Your mouse cursor changes to a text selection tool when you’re over text so you can select, copy and paste content.

Deck Editor
The preview area is to the right of your list of cards. Any changes to the inline content or visual attachments will show up on the right.
Running a presentation
When you press “Start” or click the play button on a card, the preview editor will be replaced with a view of your virtual camera, with a LIVE indicator.
You will see your teleprompter text above the camera preview and the Dashboard slides out from the right.
What is a card and what is a slide? Simple
What is a card?
A card starts with text for your teleprompter.
Think of it as a cue card that reminds you what to say next.

Tagging some of the text on a card puts that text on a “slide”.

What is a slide?
A slide is made up of text, images, videos, screen shares or a second camera.
Tag your teleprompter text to make it appear on slides.
Here you can see the slide created by the tagged text on the card.

Slide alignment
Slides are arranged according to their “alignment” setting.

Text and images are arranged at the bottom, top, left, right or middle of the screen according to this setting.
How do slide images work?
Slides have “inline” images and one “background image”.
You can add as many inline images as you want by dragging them into the text area of your cards.

You can add a background image by dragging it onto the card’s “+” button.
Inline images can be turned into background images via the popup editor.
You can use background images to show full screen content or as something to appear behind your text and inline images.
Background images can be set to “fit” or “cover” the background via the popup editor.
What is a trigger?
Cards can trigger various actions, inside CueCam or on other applications.
You can add triggers using a card’s ![+] button.

Popup editors for attachments and triggers
Triggers and attachments an be clicked to reveal a popup editor.
This is how you control, for example, how a video plays.

The card sidebar
Open the card sidebar to see all of the selected card’s attachments and triggers at once.

How to plan a talk with Chat GPT Simple
On the Welcome screen, click “Generate a Script”

Enter a brief for Chat GPT.

Describe your audience, describe the talk under “Brief”, describe your desired outcome and set the number of cards you’d like.
Click Generate Script to continue. This might take a few seconds.

A new window will appear showing your new script.

Let’s add an image: click the plus (+) icon on any card and select “Generate Image”.

Enter a prompt for Dall-E and click “Generate Image”

After a few seconds, your image appears, but it’s at the bottom of the screen.

Click the Card button on the top right to open the sidebar. You can now choose a new alignment mode for your card.

And now the image appears on the left!

You can move the title underneath the card using cut and paste and change the text to something more interesting.

Click between the cards to start expanding your script.

Try the presentation by pressing “Start”

How to create a card from a layout template Simple
-
Click “Add Layout...” at the bottom-left of CueCam’s document window
-
A new card will be created after the currently selected card.
-
Pick a template.
-
Edit the text in the pink areas to change the text. If you delete any special symbols (like
##) then the title will be removed. -
Click pinned images to change them


Different types of
How to use CueCam as a teleprompter Intermediate
CueCam is built to be a great teleprompter.
You should create your cue cards with your teleprompter in mind.
All the text you add to a cue card will be visible in your teleprompter.
This is a typical card. It includes a title in a way that can be shown on screen while being read from the teleprompter.

Imagine if CueCam kept the teleprompter text separate from the titles. In this case when we save-as to make next week’s script, we’d need to change the number twice - once on the card and once in the slide editor. By keeping text and slide content in one place, we can avoid mistakes!
Try to keep your cards concise - it’s easy to flip to the next card and they’ll be easier to read if they’re short.
The teleprompter window
If you have an Elgato Prompter or similar, you will have a separate display for this device.
CueCam has a teleprompter window that you can drag onto this display.

This window can include your camera preview or another window from your computer, or you can make it transparent and drag another window behind it.

Using your iPhone as a teleprompter
If you are using Shoot as your webcam, your teleprompter will automatically appear on its screen.
Navigating cards
You navigate your teleprompter with the big pink button.

When you’re presenting, the pink button will display a preview of the next card

Cards can include bullet points (using the * syntax)

If your card has bullet points, these will be revealed one at a time and the pink button will update accordingly.

How to create slides in CueCam Simple
Add a blank card
Click the “Add Card” button to add a new blank card after the currently selected card.
Alternatively, use the keyboard shortcut
Cmd+Enterto do the same thing.

Insert a blank card above another card
Hover over the space between two cards and click.

Add a card with a specific layout
Click the “Add Layout...” button to choose from a selection of slide layouts.
You can apply any of these layouts to a blank card by using the button in the preview area to the right.

Add cards using one or more images and videos
Click “Add Media...” and browse to your content. Drag around multiple files or click while using the Shift or Command keys.

When you click “Open”, all media will be imported and attached to cards.

You can also drag and drop a set of images into the area below the last card to achieve the same effect.

How to generate a card with AI
Click “Generate” to start.
Enter a description of the content you need and use the slider to select the number of cards.
Check “Create image prompts” to include image prompts for Dall-E.
Check “Upload script for context?” if you want Chat GPT to continue your existing script, matching its tone.
Click Generate.

Wait a moment or two while the new cards are generated.

If you checked “Generate image prompt” you can use the “Generate Image...” button on any card to add an image.

Click Generate Image.. to show and edit the prompt.

After a few moments the generated image will be inserted into your card (with an appropriate filename!).

Check “Background image” if you want a 16:9 image for use as a background.

If you don’t love the results, you can use Undo to try again.
How to duplicate a card
Making sure you are not hovering over the text area (your mouse cursor should be an arrow, not a text bar), right-click any card and select Duplicate 1 Card.

How to delete a card
Making sure you are not hovering over the text area (your mouse cursor should be an arrow, not a text bar), right-click any card and select Delete 1 Card.
You can multi-select cards to delete more than one.

How to add a title Simple
Using the Layout Picker
With any card selected, choose a layout from the picker in the preview area to the right.
This will create or update tagged text and apply the correct alignment in one click.
Using the Add button
Click the Add (“+”) button on your card and select from one of the text options:

By typing
You can type title tags directly by starting any line with one of the special characters #, > , * , ^, etc...
# Heading 1
## Heading 2 (”Subheading”)
### Heading 3 (”Paragraph”)
* Bullet
> Quote ~ Attribution
^ Footnote
! image.png Adds any image already in the document bundle (so you can copy-paste this text to put the image on other slides but you have to drag the image to the card if it’s not already in the document bundle)
Top tip, the
#character is in a weird place on UK Mac keyboards - press Alt+3 to type it!
Setting the text position and contrast
You can change the position and lightness or darkness of text by using the Card Menu (up top) or the Card Sidebar (on the right).


Via the Live Camera
If there is no currently selected slide, the Slide button can be clicked to type text directly onto your webcam feed.

Live via your iPad with Live Titles
Using your iPad, draw a horizontal line and say the words you want to appear.
The size will match the length of the line.
It takes a little practice and is easier if you use your finger than with an Apple Pencil.
Keep holding until the text appears or try again if the line wasn’t straight enough!
This text will automatically appear within CueCam if it’s connected to the iPad.

How to add a slide background Simple
Use the “Add” (+) button
- Click the Add (+) button
- Scroll down and select “Background Image”
- Select a file from your computer

Using drag-and-drop
Drag an image on your computer to the Add (+) button (or anything else in the “attachments” area)

Via a layout
Select a layout with a background from the layouts menu.

Click the image attachment and then click “Replace...” to choose a new image.
You can select any other image from your document using the picker on the left.

With Dall-E
You can generate a background image using AI by clicking the Add (+) button and selecting “Generate Image...”.
Enter a description and check “Background Image”

In a few moments you will have a result. Use Undo if you want to try again!

How to add a slide image Simple
Using drag and drop
Slides have “inline” images and one “background image”.
You can add as many inline images as you want by dragging them into the text area of your cards.

Using the Add (+) button
Click the Add (+) button and select Image.
Click the attachment to replace.
By selecting a layout
Select a layout that includes a slide image.

Click the attachment and use Replace... to change it.

Generated using Dall-E
Click the Add (+) button and selecting “Generate Image...”.
Enter a description for your image.
Click “Generate image” and wait a few moments.

And there you have it (usually it generates better filenames).
How to add a video to a card Simple
Use the Add (+) menu
Click a card’s Add (+) button and scroll to “Media” → “Video”

The image will be converted.

Now you can preview the video with the controls on the right.

Drag and drop to a card
Drag a movie file from Finder directly onto a card to convert and import.

Drag and drop to the end of the document
Drag a video to the end of a document to create a new card.

Use the layout picker
Select the “Movie” layout from the Slide Layout picker.

Click the card attachment and use “Replace...” to change the video.

Record directly onto a card
You can record CueCam’s current output directly onto a card via the sidebar.
Add multiple videos at once
Click “Add Media...” to create cards by multi-selecting videos and images.
You can also drag multiple images to the end of the document.
Add without converting
If you don’t want to convert your video files to 1080p h.265 encoding, you can skip this step by holding the Option (⌥) key when dragging a video onto a card.
Editing video settings
You can access video settings by clicking the attachment or by opening the Card inspector on the right.

Presenting a video
Click the ‘play’ button on the left of a card to present it as part of the current deck.
Muting videos
Open the video settings and select “Mute Video”
Muting your mic during video playback
Open your video’s settings and select “Mute Mic”
Trimming videos
Click the “Trim” button on a video’s settings to set start and end points.
Click “Trim” when you are finished.
Changing the video’s volume
Adjust the playback volume using the slider in a video’s settings.
Or use the Dashboard fader while presenting it.

Looping a video
Open the “End Action” picker in the video’s settings. Select “Loop”.

Continuing a presentation when video has finished playing
Open the “End Action” picker in the video’s settings. Select “Next Card”.

How to add a video background Intermediate
To use a video as a background you can attach a video as you usually would ( How to add a video to a card) and then change a couple of settings.
- Mute the video
- Enable “Loop”

To see an example, select the Video Background layout from from the Layout Picker.

How to share a second camera from a card Simple
Click on a card’s Add (+) button, scroll down to “Second camera” and select a source.

When sharing a second camera, your main camera will be shown picture-in-picture.
In EDITOR mode you can click to hide this, or change it through the Card sidebar.

If you use Shoot as a second camera (it works great as an overhead camera!) then you can access its controls from the card panel.
How to use Shoot Pro Webcam with CueCam Presenter

How to remove a second camera
In the dropdown menu, select the blank space at the top to clear the selection.
How to share your screen from a card Simple
You can share a screen, app or window from a card.
Using the layout picker
Select “Share Screen”, “Share App”, or “Share Window” in the layout picker.
You may now be prompted to select a window or app. You can navigate your windows using the dock, Cmd+Tab etc... and click on one to select.

Your default desktop
If you share your screen, by default your “Default Desktop” will be attached to the card.

To change your default desktop, share a different screen from your Dashboard.

Your default desktop is indicated with a check mark.
You can also change this from the Present menu.

Using the Add (+) button
You can select a screen, window or app directly using the Add (+) button.


How to share a connected iPad or iPhone’s screen Simple
If you have an Apple device connected to your Mac with USB, you can share it from your Dashboard or from a card.
Share from the Live Camera / Dashboard
Click the arrow on the right of the Share button (or right-click). Click “Apple Devices” and select your device.

Your device will fill your screen and you will appear in picture-in-picture.

You can select a frame through the Share Button right-click menu. Select from a library of devices to find the one you need (powered by Fastlane Frameit).

The device frame will be automatically downloaded and applied whenever you share this device in future.

It looks great with Aside 3D!

If you rotate your device the frame will fill the available space.

Here it is again in Aside 3D.

And you can now draw with Video Pencil.

Sharing from a card
Click the Add (+) button and scroll to Screen Sharing. Click “Apple Device...” and select your device.

Click the attachment to change the frame (this frame will always be used for this device, not just on this card).

You can also access these settings via the Card sidebar.

How to add bullet points in CueCam Simple
Bullet points are added by starting a line with a * character, e.g.
* Bullet 1
* Bullet 2
* Bullet 3
You can type them or add them through the Add (+) button.

You can choose from a range of layouts to determine where your bullets will appear by using the Card sidebar, the Card menu, or with keyboard shortcuts ⌘+1, ⌘+2 , ⌘+3 etc...


When you present a card, bullet points will be revealed one at a time when you press the Next button.

You can put notes in brackets if you want to add more details for your teleprompter.

Your teleprompter will filter the notes for each bullet point to keep you focused.

How to add quotations to slides Simple
You can add quotes via the Add (+) button.

The “Quotation” part will be selected so you can paste your quote or start typing. Edit the part after the ~ to set the attribution.

You can change the layout using the Card sidebar, the Card Menu or with the keyboard shortcuts ⌘+1, ⌘+2 , ⌘+3 etc...


If you would like to add a citation to your quote (and you probably should!) then you can use the ^ Footnote syntax.
> Quotation ~ Attribution
^ Footnote
This will add a footer with your attribution.

If you would like to label your footnotes, add a ^1 to the end of your attribution and change the footnote to ^1 Footnote, like this:
> Every child begins the world anew — Henry David Thoreau^1
^1 Walden; or, Life in the Woods, 1954

How to add footnotes to slides Simple
Footnotes appear at the bottom of the screen and can be added to slides with the ^ Footnote syntax.
Use the Add (+) button to add via the menu.

The text will be selected ready to replace.

On screen, this looks like so:

If you add extra content, the position of the footnote will be adjusted accordingly.

You can add a number to a footnote and it will appear in superscript format, by placing a number after the caret(^), before the space.

How to make a lower third Simple
You can make a simple, easy-to-edit, lower third by adding text and/or images into a CueCam slide.

Using the layout picker
The easiest way is using the layout picker’s “Title & Icon” option.

Here you can customise the text (without deleting the text tags # ).

Changing the icon
To change the image, click the attachment.

Adding more text
To add more text, you can use the menu.

Adding more images
You can add more images by dragging them from your computer into the card’s text area or using copy-paste from anywhere.


How to change the text size and colour Simple
You can change the overall text size of a document but all text sizes are defined by the tags used and the context in which they are presented.
You can make text dark or light to make sure it is legible on different backgrounds, but you can’t change the colour.
You can change the background colour of text if you use certain rendering modes (available via the Doc tab).


How to trim videos on cards Simple
You can trim videos attached to cards inside CueCam.
This is non-destructive and will not affect the source video (or your file size!)
Start by clicking the video attachment (you can also use the Card sidebar).

Click “Trim”

It’s easiest to drag trim points in the large video preview.
Don’t forget to press “Trim” when you’re done.

Now this video will start and stop at the times you set.
How to add cards using a set of images Simple
If you have a set of images to use as cards, you can add these using the “Add Media” button at the bottom of the card list.

You can then multi-select the images in the file browser.

Each card will get a full-screen image.

You can customise slides with the popup-editor or the Card sidebar (this lets you multi-select cards to change multiple cards at once).

Alternatively: drag and drop
If you select a set of images in Finder you can drop these directly into your deck and a card will automatically be created for each.

How to add cards from a set of videos Simple
If you have a set of videos to use as cards, you can add these using the “Add Media” button at the bottom of the card list.
You can then multi-select the videos in the file browser.

A card will be created for each video.
You can customise video playback with the popup-editor or the Card sidebar (this lets you multi-select cards to change multiple cards at once).
Alternatively: drag and drop
If you select a set of images in Finder you can drop these directly into your deck and a card will automatically be created for each.

How to add an overlay or watermark to your presentation Simple
Branding / watermark overlays are attached per-document.
Overlays are anchored to the top-right of the presentation and should have a transparent background.
In your script, go to the Doc tab. Click the placeholder labelled “Overlay” to browse for an image.

It won’t necessarily appear straight away.

When you run the presentation, you will see the image at the top-right of the video.
This example looks bad because we didn’t add any transparent padding to the image.

Add a 20px margin to make it look less crowded.

If you want to place your branding in any other corner, make a transparent image of size 1920x1080 and place the logo anywhere you like!

This may have changed by the time you read this to make it easy to switch to vertical or square video formats.
How to collaborate on CueCam presentations Intermediate
CueCam presentations are document bundles that bundle video, image and audio assets.
You can share a bundle with a friend or colleague and they will be able to run the same presentation with ease.
Documents can be uploaded to a centralised repository if you want to make presentations available within your company.
Uploading bundles
On a Mac, these bundles appear as a single file, but systems like Dropbox or OneDrive, or email clients, might see them as folders. It’s useful to understand this when sharing.
On most platforms you can share a zip (secondary-click “Archive”) to avoid this problem.
Dropbox tip
If you upload to Dropbox and copy the share link (no need to zip first), you can provide the smoothest experience for your recipient by changing the url to end with dl=1 instead of dl=0.
Version control (git)
CueCam bundles work well with version control systems like Git.
All content is encoded in JSON format with attachments appearing as separate individual files.
This makes it easy to compare versions and track changes.

How to set a countdown timer for your presentation Intermediate
CueCam Presenter comes with a simple-to-use beautiful countdown timer that you. can easily add to any presentation.

To use this timer, you need to set the start time of your presentation.
In your CueCam presentation, open the Doc sidebar.

Click “Set start time” under Countdown to create the timer.

E.g. If you are starting at 5pm:

When you press the Start button, the timer will appear (unless the start time is more than an hour away!).

This looks best if you create a background to match. You can find an example by selecting the “Video Background” layout.

You can create something that looks like this:

How to trace an image in Video Pencil Intermediate
Add an image to your Media library by picking from files, photos or using paste.
Once you have the image in your library, long-press to show its options.

Give the image a good filename to make things sensible. You can now either draw immediately or scroll down to “Copy Link to Trace”.

Once copied, you should be able to paste this to your Mac.

In your CueCam document, click “Open a URL / Link / Website”

Click the URL attachment and paste in the link.

Now when you land on this card, the tracing image will be loaded.

You can trace this image and your audience will see only your drawing!

How to automatically pause a video in Video Pencil Intermediate
First add a video to your media library by using Pick from Photos... or Pick from Files...
Now in the Media menu, long-press that video.

If your video contains chapter markers
If your video contains chapter markers, use the toggle switches (or PAUSE ALL, UNPAUSE ALL) to automatically pause the video at this point.

Adding pause points manually
Use the video player at the top to navigate your video.
Tap “ADD PAUSE” whenever you want a pause point. You can change your mind by tapping the row that appears under PAUSE POINTS.

When you load this video you will see the pause points indicated on the timeline.
How to load a video into Video Pencil from a card
How to play music in CueCam Intermediate
CueCam music playback is “event-driven” instead of being attached to a specific card. You can start, stop and fade music up and down with a trigger on a card.
This means that you can add and remove cards or video sequences at will and the music will keep playing until you want it to stop or fade out.
You can fade down music when you start talking and have it fade back up when showing a title sequence.
How to start music playback
Use the Add (+) button on a card to create a “Load Music” trigger.

You can then click on the trigger to select a music file. This music file will be bundled into your document so make sure you have the right to share it if you send your document to someone else. You can load most Apple-friendly music formats like mp3, m4a etc...

Now you can set the volume and fade time of the track. The fade time is indicated after the file name on the card attachment button.

Changing the music volume with a fade
If you add a fade, it will affect the currently-playing music. If no music is playing, nothing will happen when the card is presented.
Use the Add (+) button to create a “Fade To...” trigger on a card.

Stopping music
If you want to stop the music on a specific card, you can add a “Stop Music” trigger with the Add (+) button.
If you want to stop the music immediately, you can use the Music button in the Dashboard.
The Dashboard’s music button shows playback progress, the current LUFS volume, a large Stop button and the currently playing track name.
You can mute the music without pausing playback by tapping in the lower part of the button (but not the Stop button), or you can stop it completely using the Stop button.

If you click the pink area you can see monitoring options and a volume control.

How to use Ecamm Live with CueCam Presenter Intermediate
The simplest way to use CueCam with Ecamm is to select CueCam’s virtual camera as a source in Ecamm Live.

Select CueCam Audio as your main mic input. Always leave it at 100% or you will not get the benefits of CueCam’s LUFS metering.

This gives you:
- Automatic Video Pencil and Shoot integration
- All of CueCam’s live and card-based sharing features (slides, images, videos, window, second camera and more)
- CueCam’s Aside 3D, camera LUT and green screen features
- Audio from videos, screen shares and other CueCam / Video Pencil sound effects
- The benefits of CueCam’s LUFS audio meters
You can add any additional branding and custom overlays in Ecamm to use in your live streams, along with other features like Interview Mode.
Drawing on your screen or videos
If you want to draw on a video or your screen using Video Pencil, be sure to share content via CueCam, not Ecamm.
How to use Video Pencil with CueCam Presenter
How to quickly share a video from your computer
How to quickly share your desktop
Keynote and Powerpoint presentations
Build your presentation inside CueCam instead of sharing, for example, a Keynote window.
How to import slides from Keynote, Powerpoint or other applications
Use the right program feed in your teleprompter
When live streaming, use CueCam’s teleprompter to share Ecamm’s Program Window instead of using CueCam’s Virtual Camera for a more accurate view of what you are sharing.
Understanding the teleprompter window
Switching Ecamm scenes from CueCam cards
You can drive your Ecamm-based stream from CueCam by triggering scene changes from cards.
With Ecamm running (and after accepting permission for CueCam to control Ecamm), you can add an Ecamm scene to a card.
Start a new script from the menu bar with File → New
Click ”More” button in the toolbar and go to Ecamm Live Scene...→ and then select the scene you would like your first card to run.

You will now see the Ecamm scene selector in your card. When this card is presented, Ecamm will switch to the selected scene. You can change the scene using the menu on the card.

To access Ecamm Scenes directly, secondary-click the toolbar and select “Customize Toolbar...” Now you can drag “Ecamm...” into the toolbar for quick access.

Continue adding cards to build out your show.

How to draw on an Ecamm Live scene that doesn’t use CueCam as the main source
CueCam exposes a Syphon feed of the transparent layer from Video Pencil.
You can add this as a camera overlay to any Ecamm scene.
Make sure it fits edge-to-edge full screen by snapping to the centre and then using the mouse wheel or track pad to zoom it to the maximum size.
Lock the layer so you can still drag your Ecamm window.

In order to see Ecamm’s output on your iPad, either select Ecamm’s Virtual Camera as a source in CueCam or select Ecamm’s NDI output in Video Pencil.
First enable NDI.

Then select the source on your iPad.

In future it will be possible to switch iPad cameras directly from CueCam but if you need this urgently, please add a suggestion in the Discord. How to request new features for CueCam Presenter
How to use OBS with CueCam Presenter Advanced
The simplest way to use CueCam with OBS is to select CueCam’s virtual camera as a Video Capture Device in OBS.
Add a Video Capture Device.

Call it CueCam and press “OK”.

Select CueCam as the source and press OK.

This brings through CueCam’s virtual camera.

Select CueCam Audio as an input. Since you’re using CueCam, it may be better to do this per-scene, since you won’t need as many scenes but it’s likely you might want a scene where CueCam’s audio is muted (for a countdown timer and music loop, for example).
Click the + icon in the Sources panel and select “Audio Input Capture”.

Call it CueCam Audio and click OK.

Select CueCam Audio as the source and click OK.

You now have CueCam’s audio in OBS. Always leave CueCam’s volume at 0.0 dB inside OBS or you will not get the benefits of CueCam’s LUFS metering and mixing.

This gives you:
- Automatic Video Pencil and Shoot integration - drawing on anything, iOS devices as wireless cameras
- All of CueCam’s live and card-based sharing features (slides, images, videos, window, second camera and more)
- CueCam’s Aside 3D, camera LUT and green screen features
- Audio from videos, screen shares and other CueCam / Video Pencil sound effects
- The benefits of CueCam’s LUFS audio meters
You can add any additional branding and custom overlays in OBS to use in your live streams.
Drawing on your screen or videos
If you want to draw on a video or your screen using Video Pencil, be sure to share content via CueCam, not OBS.
How to use Video Pencil with CueCam Presenter
How to quickly share a video from your computer
How to quickly share your desktop
Keynote and Powerpoint presentations
Build your presentation inside CueCam instead of sharing, for example, a Keynote window.
How to import slides from Keynote, Powerpoint or other applications
Use the right program feed in your teleprompter
When live streaming, use CueCam’s teleprompter to share an OBS’s Window instead of using CueCam’s Virtual Camera for a more accurate view of what you are sharing.
Understanding the teleprompter window
Switching OBS scenes from CueCam cards
You can drive your OBS-based stream from CueCam by triggering scene changes from cards.
First, you will need to set up OBS’s WebSocket Server.

Check “Enable WebSocket server”. Create a server password and note the Server Port.

Open CueCam’s Settings window.

Enter the OBS server port and password.

Ensure that your OBS Scenes are named correctly. Scenes are selected by name from Ecamm so they will not be found if you change their names later.

Click the Add (+) button and scroll to OBS Scene. Under this option you will find all of the scenes in your current OBS profile.

You will now see the OBS scene selector in your card. When this card is presented, OBS will switch to the selected scene.

How to draw on an OBS scene that doesn’t use CueCam as the main source
CueCam exposes a Syphon feed of the transparent layer from Video Pencil.
You can add this as an overlay to any OBS scene. Click + and select “Syphon Client”.

Name this layer Video Pencil.

Select “![Video Pencil via CueCam] Video Pencil Layer” and check “Allow Transparency”.

In order to see this on your iPad, activate OBS’s Virtual Camera. Here’s how it looks when it’s running.

In CueCam select OBS Virtual Camera as your Main Camera.
Now you can see your OBS feed on your iPad using Video Pencil and draw on it, live on stream.

How to use mimoLive with CueCam Presenter Advanced
The simplest way to use CueCam with mimoLive is to select CueCam’s virtual camera as a source in mimoLive, along with CueCam Audio.

This gives you:
- Automatic Video Pencil and Shoot integration
- All of CueCam’s live and card-based sharing features (slides, images, videos, window, second camera and more)
- CueCam’s Aside 3D, camera LUT and green screen features
- Audio from videos, screen shares and other CueCam / Video Pencil sound effects
- The benefits of CueCam’s LUFS audio meters
You can add any additional branding and custom overlays in mimoLive to use in your live streams, along with other features like Interview Mode.
Drawing on your screen or videos
If you want to draw on a video or your screen using Video Pencil, be sure to share content via CueCam, not mimoLive.
How to use Video Pencil with CueCam Presenter
How to quickly share a video from your computer
How to quickly share your desktop
Keynote and Powerpoint presentations
Build your presentation inside CueCam instead of sharing, for example, a Keynote window.
How to import slides from Keynote, Powerpoint or other applications
Use the right program feed in your teleprompter
When live streaming, use CueCam’s teleprompter to share mimoLive’s Program Window instead of using CueCam’s Virtual Camera for a more accurate view of what you are sharing.
Understanding the teleprompter window
Switching mimoLive layer sets from CueCam cards
You can drive your mimoLive-based stream from CueCam by triggering layer set changes from cards.
First, set up your layer sets in mimoLive:

Click the Add (+) button and scroll to mimoLive layer set. Under this option you will find all of the open documents and available layer sets.

You will now see the mimoLive layer set selector in your card. You can run through your script and present a different layer set when you present a certain card. When this card is presented, mimoLive will switch to the selected layer set.

How to draw on an mimoLive layer set that doesn’t use CueCam as the main source
CueCam can expose a Syphon feed of the transparent layer from Video Pencil. You can add this as a layer in mimoLive.
Enable CueCam’s Syphon output in CueCam Presenter → Settings


Configure the layer with the little three-dots button.

Click the large “Video Pencil Layer” from “Video Pencil via CueCam” to select this source.

Make this the top layer and you will see it as a transparent overlay on your feed.

In order to see mimoLive’s output on your iPad, either select mimoLive’s Virtual Camera as a source in CueCam or select mimoLive’s NDI output in Video Pencil.
Using CueCam’s connection to see mimoLive in Video Pencil
To use mimoLive as a CueCam source, first add a Virtual Camera output in mimoLive.


In future it will be possible to switch iPad cameras directly from CueCam but if you need this urgently, please add a suggestion in the Discord. How to request new features for CueCam Presenter
Using NDI to see mimoLive in Video Pencil
Alternatively, you can use NDI.
Add an NDI output in mimoLive.

Select this in Video Pencil.

How to send a keystroke to another app from a card Advanced
Click the Add (+) button on a card and select “Add Keystroke Trigger”.

Click the card attachment to choose the receiver app. You will see a select box to choose the target app, and an empty area that says “Click to add shortcut”.

Choose an app and select a shortcut to finish creating the keystroke trigger.

How to load a video into Video Pencil from a card Advanced
You can load a video into Video Pencil on your iPad, using a trigger on a CueCam card running on your Mac.
Long-press the video in your Media menu in Video Pencil and tap “Copy Link to Load”

In CueCam, select “Add a URL / Link / Website”.

Paste the link and now the video will be loaded (with pause points) when you present this card.

How to change the selected Video Pencil tool from a card Advanced
Video Pencil can be controlled from CueCam Presenter using the Video Pencil toolbar item.

You can right-click any of these items for a deep link.

This will give you something like cuecam://ipad-control/select-tool/1
To trigger this change from a card, add a URL trigger:

Click the trigger attachment and paste in the url.
Now when you present this card, the relevant tool will be selected.

How to send OSC messages from a card Advanced
You can control apps that support OSC from CueCam.
An OSC Client has an address and a port number, and a number of named parameters that can be controlled.
Here is Ableton Live using the Connection Kit module OSC Send to control a Utility module.
With this set-up we can toggle an Ableton track from a CueCam card.

1. Add target app in CueCam

Edit the newly added “app” to have the correct name, host and port number.

Add a new OSC Trigger to a card.

Select the target app.

Set the address and value to send.

You can send multiple values to the same address with the add value button. (For more addresses, add more OSC Triggers).

Now when you present this card, you should see the effect in Ableton.
Please contact Michael if it doesn’t work - it’s not well-tested!
How to jump to another presentation Advanced
If you have a presentation that you want to include in the context of a longer presentation, say a technical how-to as part of a general introduction to a product, or you want to go into detail of a product feature during a sales call, you can set up a CueCam script to jump to a different script and back.
If you have two scripts, “Script A” and “Script B”, and you add a “Jump To Card” action to the second card of Script A, here is the order in which the presentation will run as you press the “Next” button.

We actually jump to another card using its deep link, which gives you even more flexibility if you need it.
How to set up “Jump To Doc”
In the destination document (”Script B” below), secondary-click on the first card and select “Copy Deep Link”.

In your main document (”Script A”) click the Add (+) button on the card you want to jump from.
It’s worth adding a note saying where it will jump to avoid confusion in future.

Click the trigger and paste the deep link.

Now when you present the card with the Jump To Doc trigger, the presentation will switch over.

Note that when the second presentation is finished, instead of “Stop” you’ll see “Jump Back”.

Note that after Jump To Doc has been triggered, pressing Stop anywhere else will result in a return to the initial presentation, so use this feature with care.
Deep Links Supported by CueCam Presenter Advanced
Here are all of the deep links supported by CueCam.
Present next card: cuecam://next
Present previous card: cuecam://previous
Stop presenting: cuecam://stop
Start presenting: cuecam://start
Clear currently-presented slide (first call), then clear currently-presented share (second call): cuecam://clear
Select main camera: cuecam://Name%20Of%20Camera
Toggle Aside 3D: cuecam://aside
Toggle default share (as shown in the Share Bar): cuecam://toggle-default-share
Toggle main camera: cuecam://toggle-main-camera
Share named capture (e.g. Screen Name, App Name(s), Window Name): cuecam://share/Name%20Of%20Share
Present card: cuecam://card/unique-identifier-string
Toggle Virtual Mic Output: cuecam://virtual-mic/toggle-mute
Toggle Headphone Monitoring: cuecam://audio-monitoring/toggle
Toggle audio input: cuecam://audio-router/Source%20Name/toggle-muted
Toggle audio input headphone monitoring: cuecam://audio-router/Source%20Name/toggle-monitoring
Select Program Feed to show in Teleprompter or Shoot: cuecam://program/Source%20Name
Toggle recording: cuecam://record
Controlling Shoot
Select Shoot preset: cuecam://Device%20Name/select/preset-identifier
Controlling Video Pencil
Open video in Video Pencil: cuecam://ipad-video/filename-in-media-picker
Trace image in Video Pencil: cuecam://ipad-trace-image/filename-in-media-picker
Select tool by number: cuecam://ipad-control/select-tool/1
Clear drawing: cuecam://ipad-control/spacebar
Select Erase tool: cuecam://ipad-control/erase-tool
Select Lasso tool: cuecam://ipad-control/lasso-tool
Select Magic Wand: cuecam://ipad-control/select-magic-wand
Select Laser Pointer: cuecam://ipad-control/laser-pointer
Toggle Live Titles: cuecam://ipad-control/toggle-live-titles
Select language for Live Titles (1-3): cuecam://ipad-control/select-language/2
Undo Drawing: cuecam://ipad-control/undo-drawing
Redo Drawing: cuecam://ipad-control/redo-drawing
Forward playing video by one frame: cuecam://ipad-control/forward-one-frame
Backward in current video by one frame: cuecam://ipad-control/backward-one-frame
Select canvas by identifier (a canvas is a drawing that can be returned-to, e.g. when navigating slides while presenting a deck): cuecam://ipad-control/select-canvas/unique-identifier
Clear all canvases: cuecam://ipad-control/clear-all-drawings
Audio
![]()

How does audio work in CueCam? Intermediate
CueCam mixes audio from your main microphone, videos, screen shares and music.
Select CueCam Audio as your mic input in Zoom, Teams or elsewhere.
You can choose which audio is sent to your headphones.
Usually you want everything except your main microphone to be in your headphones.
The reason not to include your microphone is that it will be distractingly delayed. Your microphone or audio interface may provide a direct monitoring feature to mitigate this problem.
Audio meters
CueCam provides LUFS metering, which is the most accurate way to measure how loud something sounds.
You will see green indicators when your levels are around -23 LUFS which is the perfect volume for your voice.
How to choose what goes to your virtual mic
Here we are hearing audio from the main mic (”RODE NT-USB”) but a currently-playing video is muted.

You can toggle whether an audio source is muted by clicking on its icon.
How to choose what you hear in your headphones
Here we can see the main mic is not going to headphones but the sound from the video is.
Look at the headphone icon to see the headphone monitoring status.

To change this, click on the headphone icon and then click the “Headphone Monitoring” button.

Alternatively, you can use a secondary (right or two-finger) click to show the context menu and toggle it there.

Changing the headphone output
Click the arrow under the headphone icon and then use the picker under the volume control.
Changing the headphone volume
To change the headphone volume click the arrow under the headphone icon to show the fader.

Capturing audio from screen shares
You must share an app or a window to send its audio from CueCam.
Additional audio sources
Add extra sources by clicking the —+— line in the audio dashboard.

A new panel will appear for each new source.

Multi-channel interfaces
If your interface has more channels than usual, you will see a selector to choose the input channels.

Setting audio delay
Some cameras will add lag to the video. You can adjust the audio delay of an audio input to keep your audio in sync.
Show the audio panel by clicking the pink part of an audio pad and enter a delay in the Delay field.
If you don’t know the correct delay, you can use CueCam’s built-in delay calculator.
Adjusting your audio delay with CueCam’s built-in delay calculator
Adjusting your audio delay with CueCam’s built-in delay calculator Intermediate
If you are using a USB camera or using Shoot, then you may need to adjust your audio delay.
CueCam provides a delay calculator to make this easy.
-
Navigate to your Live Camera
-
Right-click your Mic button and select “Delay Calculator”
-
Get ready by raising and opening your hands
-
When prompted, clap and keep your hands together
-
Click the audio peak created by your hand clap
-
Find the frame where your hands meet in the video by clicking the timeline
-
Click “Save Delay”


Your audio will now be perfectly in sync!
Edit your audio delay manually
-
Open your Mic settings
-
Edit the delay time


Working with a secondary video/audio source
You can set different audio delays for different inputs.
You can add another audio input from the View menu.

You can then share a second camera and use the Delay Calculator on this second input to keep them in sync.
For example, I (Michael) sometimes play live music on stream and I have a multi-channel audio interface. My music equipment is elsewhere in the room so I set up Shoot pointing at it.
I can synchronise this second camera to my big sound card to make sure the music stays in sync.
This can all be independent of the main mic and camera used for my CueCam presentation.
Account & Billing

Access discounts for Shoot, Video Pencil and Beat Sheet users Intermediate
If you already paid for one of the apps that works with CueCam, or you want to migrate from Beat Sheet, your purchases can be discounted from your first payment.

If you bought Shoot and/or Video Pencil
- Download and install CueCam Presenter
- Sign in to CueCam Presenter inside the app
- Launch Shoot and/or Video Pencil on your other device(s)
- Your discounts will now be available when you go to purchase.
If your Shoot or Video Pencil discounts don’t appear
Try clicking the account status indicator on CueCam’s launch screen (the little red x or green tick)

If problems persist, contact michael@squares.tv.
If you bought Beat Sheet
CueCam cross-references your https://squares.tv account (where Beat Sheet is purchased) with your Stripe account (the payment platform) to calculate your Beat Sheet discount.
Your Beat Sheet discount will show up at automatically at purchase, as long as you used the same email address for both platforms.
You may have problems if you purchased under a different email address to the Apple ID used to sign in to CueCam.
If your Beat Sheet discount doesn’t show up automatically when you go to purchase, please contact michael@squares.tv for help.
Manage your Plan(s) Simple
Plans you have purchased are listed on your account page.
Click on a row under “Your Plans” to see more.

Here you can see information about this Plan.
Click “Manage Subscription” to go to the Stripe billing portal and manage your payment information.

Add somebody a plan Simple
Plans you have purchased are listed on your account page.
Click on a row under “Your Plans” to see more.

How to add somebody to a seat
- To add somebody to a seat, enter their email address under that seat.
- ![optional] You can customise the email that will be sent with the invitation by editing the text under Invitation Email.
- ![optional] Use the Preview button to see how this email will look before you save.
- When you press Save Plan they will be emailed with information on how to use it.
Only one person can occupy a seat
If you change an existing email address assigned to a seat, the previous occupier will lose access.
Relinquish a Seat Simple
You can remove yourself from a seat by clicking “Relinquish Seat” on your Account page.

This is useful as it allows somebody else to use an otherwise-filled Plan via an Invitation Link.
Running Presentations
![]()
How to navigate your presentation Simple
CueCam Presenter features a big pink “Play” button that you can use to start and navigate your presentation.
Before you start it looks like this:

Here’s a very short presentation:

When you first press the Start button, the Virtual Camera and Dashboard are revealed. This lets you adjust your Main Camera and audio settings if you need to.

The text of the pink button changes to preview the next card’s content and reveals the “Stop” button to the right.

Clicking the button takes us to the next card and shows any attached shares, triggers or slide content.

When you reach the last card, the pink bar changes to become the “End Presentation” button.

Cards with bullet points
If you have a card with bullet points, the big pink button changes to reveal these bullets one at a time.
Here we have landed on a card with bullets and the pink button changes to show “Next Bullet: First thing”.

Clicking the button reveals the first bullet and changes to show “Next Bullet: Second thing”

When all bullets have been revealed, the button changes to show “Next Card” and will continue to the next card when clicked.

Keyboard shortcuts
You can use the shortcuts ⌥⌘→ and ⌥⌘← to navigate your script a CueCam window is focused.
Stream Deck
With CueCam’s Stream Deck plugin installed, you can add the Next button.

On a Stream Deck, the button will update while you are presenting.
Start:

Next Card:

Next Bullet Point:

End Presentation:

Here’s the recommended configuration for a Stream Deck Foot Pedal.

Apple Shortcuts
CueCam Presenter works with Shortcuts.

Options are currently limited so feel free to ask for more on Discord.
How to request new features for CueCam Presenter
Deep Link
You can trigger the “Next” action with a deep link by calling the url cuecam://next from any other application.
You can test this by pasting it into Notes (and pressing space to make it into a link).
Click the link and CueCam will navigate to the next card.

Considerations
CueCam can only present one document at a time but the Next action is a global behaviour. This means that you may sometimes need to intervene to make sure the correct presentation will run, if multiple presentations are loaded, by clicking the “Start” button in the correct window.
If you trigger a “Jump To Doc” action then the End Presentation action will be replaced with a Jump Back action at the end of the jumped-to doc.
How to jump to another presentation
Understanding the teleprompter window Intermediate
CueCam’s teleprompter window is designed to be used with a connected teleprompter device like an Elgato Prompter, or a Glide Gear teleprompter with a Liliput monitor or iPad running Duet.
Once set up correctly, a teleprompter will appear to your Mac as an extra display.

You can reveal CueCam’s teleprompter window with the toolbar button.

The teleprompter window has various functions.
- Your camera preview
- Your teleprompter
- Audio level of your virtual mic (using LUFS)
- Presentation navigation and recording controls.
- Source selector (more on this below)

Drag it to the teleprompter’s display to continue. For best results, make it full-screen.

Changing the position
You can drag the teleprompter to a different position if you need to.

Changing the width and font size
Hovering over the teleprompter text gives you more controls.

Below we see:
- Font size - click the big and small A buttons to change the text size.
- Max width - drag this bar left and right to change the maximum display width.

The teleprompter area will always take the minimum possible size based on the currently-displayed text.
Audio monitoring
Your audio meter should be in the green for a good -23 LUFS signal.
If you get too loud, you’ll see a warning in your teleprompter.

Alternative sources
If you want to use this window for your remote video calls, you can select your Zoom, Teams or Meet window from the selector at the top.

Alternatively you can use the “Transparent Window” option. The teleprompter window always stays on top of other windows so this way you can drag any other windows you need onto your teleprompter and keep the CueCan’s HUD on top of everything else. Here it is dragged on top of Ecamm Live’s Program window.

How to take over a Zoom call with your presentation Intermediate
How to use Shoot as a teleprompter with CueCam Presenter Simple
With CueCam Presenter you can build scripts based on cue cards.
When you run your presentation with a device running Shoot connected, you’ll see your teleprompter notes on the device’s screen.
If the text is too small you can pinch to change its size.
Community & Feedback
![]()
How to get help from other CueCam, Video Pencil and Shoot users Simple
You can access an active community of Video Pencil, Shoot and CueCam Presenter users on Discord.
To join, follow this link: https://squares.tv/discord
How to request new features for CueCam Presenter Simple
Feature requests for CueCam Presenter should be made via the CueCam Suggestions Discord channel.
To access this channel, first join the Squares TV Discord server via https://squares.tv/discord
You can then review the current feature requests in #cuecam-suggestions channel.

If nobody else has suggested your idea before, use the “Create Thread” button to start a new thread.

This can be hard to spot on mobile as it requires first tapping the text field.

Now the “Gift” button has turned into the “Create Thread” button.

Please give your thread a descriptive title.
It should be a single feature request.
You can add more information within the new channel once created.

How to report problems with CueCam Presenter Simple
Bug reports for CueCam Presenter should be submitted via the CueCam Issues Discord channel.
To access this channel, first join the Squares TV Discord server via https://squares.tv/discord
You can then review the current feature requests in the #cuecam-issues channel.

If nobody else has already reported the problem, use the “Create Thread” button to start a new thread.

Using Discord on Mobile
This can be hard to spot on mobile as it requires first tapping the text field.
Now the “Gift” button has turned into the “Create Thread” button.
Bug Reporting Guidelines
Please give your thread a descriptive title.
It should be a single problem. Create additional threads if there are multiple problems.
You can add more information within the new channel once created.
Please provide screen recordings and/or screenshots to make the report as clear and easy to reproduce as possible.
Live Streaming
![]()
How to go live on YouTube with CueCam Presenter Simple
First make sure you’re logged in and have an active Suite plan.
Open the Live Camera Window (File → Live Camera).
Add your YouTube channel.

When you have granted CueCam access to your YouTube account, click Continue to CueCam.

Add a new stream by selecting “Add Stream”

Set a time, title, description and add a thumbnail.

Click Schedule Now and wait a moment. When your stream is ready, you’ll see the details and buttons to copy the link to the stream and open the YouTube dashboard.

When you’re nearly ready to go live, click Connect to YouTube in the Live Camera window. This will send live video to YouTube but the stream won’t yet be active.

Once you’re connected, you can view your YouTube dashboard, and when you’re ready to instantly go live, click “Go Live”.

View Chat in your Teleprompter
If you have a teleprompter, open CueCam’s Teleprompter window and drag it to the teleprompter screen.
As chat messages arrive, they’ll be shown in the top-right corner.
